Bricked Synology DS218j
Posted by elexidor
|
Bricked Synology DS218j January 02, 2023 12:41PM |
Registered: 1 year ago Posts: 24 |
Hi!
I have a bricked DS218j due to bad CRC issue when loading the Ramdisk:
I have tried some guides and tricks to load via tftpboot and have succeed to boot with the following sequence with changed memory order. I use a dtb-file from this post: https://forum.doozan.com/read.php?2,76314,76604#msg-76604
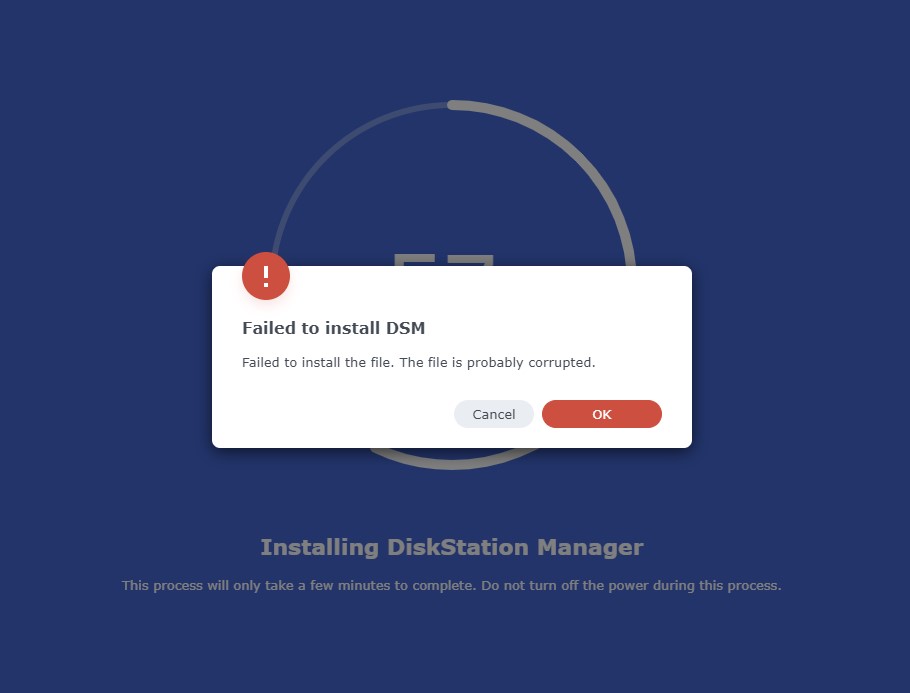
It starts the kernel, beeps and after a while brings up the web page telling the unit is possible to migrate. However, when trying to update the DSM it always fails with corrupted file message (see atached file).
The printouts from serial port during the process hints there are some disk issues and I guess the dtbdump_3.dtb is not compatible with the DS218j:
After a reset the CRC error persists.
Somone with any sugesstions how to solve this?
Is it possible to create a *.dtb for the synology_armada38x_ds218j in some way (can't find it anywhere)?
Thanks in advance!
Edited 1 time(s). Last edit at 01/02/2023 02:29PM by elexidor.
I have a bricked DS218j due to bad CRC issue when loading the Ramdisk:
SF: Detected MX25L6405D with page size 64 KiB, total 8 MiB
## Booting kernel from Legacy Image at 02000000 ...
   Image Name:   Linux-3.10.108
   Created:      2022-09-21   2:56:09 UTC
   Image Type:   ARM Linux Kernel Image (uncompressed)
   Data Size:    2251616 Bytes = 2.1 MiB
   Load Address: 00008000
   Entry Point:  00008000
   Verifying Checksum ... OK
## Loading init Ramdisk from Legacy Image at 03000000 ...
   Image Name:   synology_armada38x_ds218j 42962
   Created:      2022-09-22  10:07:49 UTC
   Image Type:   ARM Linux RAMDisk Image (uncompressed)
   Data Size:    3528278 Bytes = 3.4 MiB
   Load Address: 08000000
   Entry Point:  08000000
   Verifying Checksum ... Bad Data CRC
Ramdisk image is corrupt or invalid
I have tried some guides and tricks to load via tftpboot and have succeed to boot with the following sequence with changed memory order. I use a dtb-file from this post: https://forum.doozan.com/read.php?2,76314,76604#msg-76604
tftpboot 0xd00000 zImage
tftpboot 0x800000 rd.bin
tftpboot 0x1000000 dtbdump_3.dtb
bootm 0xd00000 0x800000 0x01000000
It starts the kernel, beeps and after a while brings up the web page telling the unit is possible to migrate. However, when trying to update the DSM it always fails with corrupted file message (see atached file).
The printouts from serial port during the process hints there are some disk issues and I guess the dtbdump_3.dtb is not compatible with the DS218j:
[   80.392700] EXT2-fs (md0): error: couldn't mount because of unsupported optional features (240)
[   80.429350] EXT4-fs (md0): mounted filesystem with ordered data mode. Opts: (null)
[   80.635687] EXT3-fs (md0): error: couldn't mount because of unsupported optional features (240)
[   80.644712] EXT2-fs (md0): error: couldn't mount because of unsupported optional features (240)
[   80.658999] EXT4-fs (md0): mounted filesystem with ordered data mode. Opts: (null)
[   80.876455] EXT3-fs (md0): error: couldn't mount because of unsupported optional features (240)
[   80.885469] EXT2-fs (md0): error: couldn't mount because of unsupported optional features (240)
[   80.899067] EXT4-fs (md0): mounted filesystem with ordered data mode. Opts: (null)
[   80.927836] EXT3-fs (md0): error: couldn't mount because of unsupported optional features (240)
[   80.936922] EXT2-fs (md0): error: couldn't mount because of unsupported optional features (240)
[   80.955376] EXT4-fs (md0): mounted filesystem with ordered data mode. Opts: (null)
[   94.165287] EXT3-fs (md0): error: couldn't mount because of unsupported optional features (240)
[   94.174319] EXT2-fs (md0): error: couldn't mount because of unsupported optional features (240)
[   94.222775] EXT4-fs (md0): mounted filesystem with ordered data mode. Opts: (null)
[  101.736994] EXT3-fs (md0): error: couldn't mount because of unsupported optional features (240)
[  101.746035] EXT2-fs (md0): error: couldn't mount because of unsupported optional features (240)
[  101.790411] EXT4-fs (md0): mounted filesystem with ordered data mode. Opts: (null)
[  107.333767] EXT3-fs (md0): error: couldn't mount because of unsupported optional features (240)
[  107.342806] EXT2-fs (md0): error: couldn't mount because of unsupported optional features (240)
[  107.391144] EXT4-fs (md0): mounted filesystem with ordered data mode. Opts: (null)
[  108.349215] EXT3-fs (md0): error: couldn't mount because of unsupported optional features (240)
[  108.358195] EXT2-fs (md0): error: couldn't mount because of unsupported optional features (240)
[  108.407940] EXT4-fs (md0): mounted filesystem with ordered data mode. Opts: (null)
[  108.630192] EXT3-fs (md0): error: couldn't mount because of unsupported optional features (240)
[  108.639216] EXT2-fs (md0): error: couldn't mount because of unsupported optional features (240)
[  108.659044] EXT4-fs (md0): mounted filesystem with ordered data mode. Opts: (null)
[  108.684257] EXT3-fs (md0): error: couldn't mount because of unsupported optional features (240)
[  108.693412] EXT2-fs (md0): error: couldn't mount because of unsupported optional features (240)
[  108.709395] EXT4-fs (md0): mounted filesystem with ordered data mode. Opts: (null)
[  108.957516] md0: detected capacity change from 2549940224 to 0
[  108.963415] md: md0: set sda1 to auto_remap [0]
[  108.967963] md: md0: set sdb1 to auto_remap [0]
[  108.972520] md: md0 stopped.
[  108.975420] md: unbind<sda1>
[  109.008612] md: export_rdev(sda1)
[  109.011953] md: unbind<sdb1>
[  109.048614] md: export_rdev(sdb1)
[  109.418006] md1: detected capacity change from 2147418112 to 0
[  109.423884] md: md1: set sda2 to auto_remap [0]
[  109.428432] md: md1: set sdb2 to auto_remap [0]
[  109.432990] md: md1 stopped.
[  109.435890] md: unbind<sda2>
[  109.488605] md: export_rdev(sda2)
[  109.492028] md: unbind<sdb2>
[  109.538604] md: export_rdev(sdb2)
[  112.903174] md: bind<sda1>
[  112.906085] md: bind<sdb1>
[  112.909413] md/raid1:md0: active with 2 out of 2 mirrors
[  112.941354] md0: detected capacity change from 0 to 2549940224
[  116.040632] md: bind<sda2>
[  116.043537] md: bind<sdb2>
[  116.046628] md/raid1:md1: active with 2 out of 2 mirrors
[  116.073773] md1: detected capacity change from 0 to 2147418112
[  116.134531]  md1: unknown partition table
[  116.202130]  md0: unknown partition table
[  117.293176] EXT3-fs (md0): error: couldn't mount because of unsupported optional features (240)
[  117.302209] EXT2-fs (md0): error: couldn't mount because of unsupported optional features (240)
[  117.330858] EXT4-fs (md0): mounted filesystem with ordered data mode. Opts: (null)
[  117.590008] EXT3-fs (md0): error: couldn't mount because of unsupported optional features (240)
[  117.599036] EXT2-fs (md0): error: couldn't mount because of unsupported optional features (240)
[  117.620652] EXT4-fs (md0): mounted filesystem with ordered data mode. Opts: (null)
[  117.645489] EXT3-fs (md0): error: couldn't mount because of unsupported optional features (240)
[  117.654511] EXT2-fs (md0): error: couldn't mount because of unsupported optional features (240)
[  117.669151] EXT4-fs (md0): mounted filesystem with ordered data mode. Opts: (null)
After a reset the CRC error persists.
Somone with any sugesstions how to solve this?
Is it possible to create a *.dtb for the synology_armada38x_ds218j in some way (can't find it anywhere)?
Thanks in advance!
Edited 1 time(s). Last edit at 01/02/2023 02:29PM by elexidor.
|
Re: Bricked Synology DS218j January 02, 2023 03:41PM |
Registered: 1 year ago Posts: 24 |
|
Re: Bricked Synology DS218j January 02, 2023 03:51PM |
Admin Registered: 13 years ago Posts: 18,543 |
elexidor,
If you are trying to get Synology DSM to work, I cannot help much.
However, you could try to boot Debian on USB. Use the Debian-5.13.8-mvebu-tld-1-rootfs-bodhi.tar.bz2. The DTB files you can try are:
In the rootfs folder /boot/dts:
=======
The kernel files corruption is apparently a common problem with Synology boxes when users try to upgrade. Perhpaps it is easier that you can boot some Debian system, log in, and then try to recover DSM from there. Or keep using Debian.
-bodhi
===========================
Forum Wiki
bodhi's corner (buy bodhi a beer)
If you are trying to get Synology DSM to work, I cannot help much.
However, you could try to boot Debian on USB. Use the Debian-5.13.8-mvebu-tld-1-rootfs-bodhi.tar.bz2. The DTB files you can try are:
In the rootfs folder /boot/dts:
armada-385-synology-ds116.dtb
armada-385-synology-rs816.dtb
armada-385-thecus-n2350.dtb
=======
The kernel files corruption is apparently a common problem with Synology boxes when users try to upgrade. Perhpaps it is easier that you can boot some Debian system, log in, and then try to recover DSM from there. Or keep using Debian.
-bodhi
===========================
Forum Wiki
bodhi's corner (buy bodhi a beer)
|
Re: Bricked Synology DS218j January 02, 2023 04:39PM |
Registered: 1 year ago Posts: 24 |
Thank's for the reply bodhi!
I tried all three files but non worked. It comes to the "Uncompressing Linux... done, booting the kernel." and hangs there.
The only dtb I have found allowing to boot is the dtbdump_3.dtb from this post:
https://forum.doozan.com/read.php?2,76314,76604#msg-76604
Unfortunately, I'm a Linux rookie sitting behind Windows and not sure how to boot from USB... Duh! :)
Quote
bodhi
In the rootfs folder /boot/dts:
I tried all three files but non worked. It comes to the "Uncompressing Linux... done, booting the kernel." and hangs there.
bootm 0xd00000 0x800000 0x01000000
## Booting kernel from Legacy Image at 00d00000 ...
   Image Name:   Linux-3.10.108
   Created:      2021-10-18  11:15:28 UTC
   Image Type:   ARM Linux Kernel Image (uncompressed)
   Data Size:    2247000 Bytes = 2.1 MiB
   Load Address: 00008000
   Entry Point:  00008000
   Verifying Checksum ... OK
## Loading init Ramdisk from Legacy Image at 00800000 ...
   Image Name:   synology_armada38x_ds218j 42218
   Created:      2021-10-18  13:15:33 UTC
   Image Type:   ARM Linux RAMDisk Image (uncompressed)
   Data Size:    3463856 Bytes = 3.3 MiB
   Load Address: 08000000
   Entry Point:  08000000
   Verifying Checksum ... OK
## Flattened Device Tree blob at 01000000
   Booting using the fdt blob at 0x01000000
   Loading Kernel Image ... OK
OK
   Loading Ramdisk to 1f6d9000, end 1fa26ab0 ... OK
   Loading Device Tree to 00ff8000, end 00fffea1 ... OK

   Skipping Device Tree update ('fdt_skip_update' = yes)

Limit DDR size at 3GB due to power of 2 requirement of Address decoding

Starting kernel ...

Uncompressing Linux... done, booting the kernel.
The only dtb I have found allowing to boot is the dtbdump_3.dtb from this post:
https://forum.doozan.com/read.php?2,76314,76604#msg-76604
Unfortunately, I'm a Linux rookie sitting behind Windows and not sure how to boot from USB... Duh! :)
|
Re: Bricked Synology DS218j January 02, 2023 04:52PM |
Admin Registered: 13 years ago Posts: 18,543 |
> I tried all three files but non worked. It comes to the "Uncompressing Linux... done, booting the kernel." and hangs there.
> Unfortunately, I'm a Linux rookie sitting behind
> Windows and not sure how to boot from USB... Duh!
> :)
Of course when I mentioned booting from USB. The first thing you should try is to boot the uImage, uInitrd, and DTB from the USB. Not the current kernel files you are booting.
Now you need a Linux box where you can be root (not just sudo). And follow the instruction in the release thread to create the rootfs Debian-5.13.8-mvebu-tld-1-rootfs-bodhi.tar.bz2
https://forum.doozan.com/read.php?2,32146
(Scroll down to 28 Sept 2021 section)
Note Step 3 in the instruction:
Create 3 different uImage files, each one with one of these DTB
And then come back, I'll show you how to boot these with tftp and get some more info.
-bodhi
===========================
Forum Wiki
bodhi's corner (buy bodhi a beer)
> Unfortunately, I'm a Linux rookie sitting behind
> Windows and not sure how to boot from USB... Duh!
> :)
Of course when I mentioned booting from USB. The first thing you should try is to boot the uImage, uInitrd, and DTB from the USB. Not the current kernel files you are booting.
Now you need a Linux box where you can be root (not just sudo). And follow the instruction in the release thread to create the rootfs Debian-5.13.8-mvebu-tld-1-rootfs-bodhi.tar.bz2
https://forum.doozan.com/read.php?2,32146
(Scroll down to 28 Sept 2021 section)
Note Step 3 in the instruction:
Quote
3. Create uImage with DTB appended. I am using the Zyxel NAS326 as an example here. Please replace armada-380-zyxel-nas326.dtb below with the appropriate DTB name for your box.
cd /media/sdb1/boot
cp -a zImage-5.13.8-mvebu-tld-1 zImage.fdt
cat dts/armada-380-zyxel-nas326.dtb >> zImage.fdt
mkimage -A arm -O linux -T kernel -C none -a 0x00008000 -e 0x00008000 -n Linux-5.13.8-mvebu-tld-1 -d zImage.fdt uImage
Create 3 different uImage files, each one with one of these DTB
armada-385-synology-ds116.dtb
armada-385-synology-rs816.dtb
armada-385-thecus-n2350.dtb
And then come back, I'll show you how to boot these with tftp and get some more info.
-bodhi
===========================
Forum Wiki
bodhi's corner (buy bodhi a beer)
|
Re: Bricked Synology DS218j January 03, 2023 07:07AM |
Registered: 1 year ago Posts: 24 |
Thank you for the help bodhi!
I have tried to follow your recommended steps but as a Windows guy I'm struggling a bit with Linux basics.
I have a second Synology box (DS220j) I can use and the creation of a Ext3 USB drive was no problem. Neither extract the tar.
However, at the third step when creating the uImage the mkimage command cant be found:
I can see it in the usr/bin folder but can not run it from there either:
Any suggestions to a Linux rookie? :)
I have tried to follow your recommended steps but as a Windows guy I'm struggling a bit with Linux basics.
I have a second Synology box (DS220j) I can use and the creation of a Ext3 USB drive was no problem. Neither extract the tar.
However, at the third step when creating the uImage the mkimage command cant be found:
-rw-r--r-- 1 root root  205052 Aug  7  2021 config-5.13.8-mvebu-tld-1
drwxr-xr-x 2 root root    4096 Aug  8  2021 dts
-rw-r--r-- 1 root root 9649821 Sep 24  2021 initrd.img-5.13.8-mvebu-tld-1
-rw-r--r-- 1 root root 7785524 Aug  8  2021 linux-headers-5.13.8-mvebu-tld-1_1.0_armhf.deb
-rw-r--r-- 1 root root 4461631 Aug  7  2021 System.map-5.13.8-mvebu-tld-1
-rw-r--r-- 1 root root 9649885 Sep 24  2021 uInitrd
-rwxr-xr-x 1 root root 5218232 Aug  7  2021 vmlinuz-5.13.8-mvebu-tld-1
-rwxr-xr-x 1 root root 5218232 Aug  8  2021 zImage-5.13.8-mvebu-tld-1
root@SYNOLOGYNAS:/volumeUSB1/usbshare/boot# cp -a zImage-5.13.8-mvebu-tld-1 zImage116.fdt
root@SYNOLOGYNAS:/volumeUSB1/usbshare/boot# cat dts/armada-385-synology-ds116.dtb >> zImage116.fdt
root@SYNOLOGYNAS:/volumeUSB1/usbshare/boot# mkimage -A arm -O linux -T kernel -C none -a 0x00008000 -e 0x00008000 -n Linux-5.13.8-mvebu-tld-1 -d zImage116.fdt uImage116
-ash: mkimage: command not found
I can see it in the usr/bin folder but can not run it from there either:
root@SYNOLOGYNAS:/volumeUSB1/usbshare/usr/bin# ls -l mk*
-rwxr-xr-x 1 root root   9928 May 23  2021 mkenvimage
-rwxr-xr-x 1 root root  43172 Sep 22  2020 mkfifo
-rwxr-xr-x 1 root root 177684 May 23  2021 mkimage
-rwxr-xr-x 1 root root   5796 May 23  2021 mksunxiboot
root@SYNOLOGYNAS:/volumeUSB1/usbshare/usr/bin# mkimage
-ash: mkimage: command not found
Any suggestions to a Linux rookie? :)
|
Re: Bricked Synology DS218j January 03, 2023 07:23AM |
Registered: 2 years ago Posts: 76 |
|
Re: Bricked Synology DS218j January 03, 2023 07:38AM |
Registered: 1 year ago Posts: 24 |
Mijzelf Wrote:
-------------------------------------------------------
> Use the full path:
> /volumeUSB1/usbshare/usr/bin/mkimage
Thanks, but no difference?!?:
-------------------------------------------------------
> Use the full path:
> /volumeUSB1/usbshare/usr/bin/mkimage
Thanks, but no difference?!?:
root@SYNOLOGYNAS:/volumeUSB1/usbshare/boot# /volumeUSB1/usbshare/usr/bin/mkimage -A arm -O linux -T kernel -C none -a 0x00008000 -e 0x00008000 -n Linux-5.13.8-mvebu-tld-1 -d zImage116.fdt uImage116
-ash: /volumeUSB1/usbshare/usr/bin/mkimage: No such file or directory
root@SYNOLOGYNAS:/volumeUSB1/usbshare/boot# /volumeUSB1/usbshare/usr/bin/mkimage
-ash: /volumeUSB1/usbshare/usr/bin/mkimage: No such file or directory
|
Re: Bricked Synology DS218j January 03, 2023 07:55AM |
Registered: 2 years ago Posts: 76 |
In that case mkimage will be dependent on other files which cannot be found due to the different path. You can try to chroot it:
chroot /volumeUSB1/usbshare/ /bin/sh
That creates a new root in /volumeUSB1/usbshare/, and executes /bin/sh from there. So /volumeUSB1/usbshare/ becomes / in that shell. Then you can
cd /boot
/usr/bin/mkimage ...
By executing 'exit' you leave the chroot.
chroot /volumeUSB1/usbshare/ /bin/sh
That creates a new root in /volumeUSB1/usbshare/, and executes /bin/sh from there. So /volumeUSB1/usbshare/ becomes / in that shell. Then you can
cd /boot
/usr/bin/mkimage ...
By executing 'exit' you leave the chroot.
|
Re: Bricked Synology DS218j January 03, 2023 10:53AM |
Registered: 1 year ago Posts: 24 |
Mijzelf Wrote:
-------------------------------------------------------
> In that case mkimage will be dependent on other
> files which cannot be found due to the different
> path. You can try to chroot it:
>
> chroot /volumeUSB1/usbshare/ /bin/sh
>
> That creates a new root in /volumeUSB1/usbshare/,
> and executes /bin/sh from there. So
> /volumeUSB1/usbshare/ becomes / in that shell.
> Then you can
>
> cd /boot
> /usr/bin/mkimage ...
>
> By executing 'exit' you leave the chroot.
Yay! That did the trick, many thanks :)
I now have three zImage and uImage files from the suggested DTB-files:
-rw-r--r-- 1 root root  205052 Aug  7  2021 config-5.13.8-mvebu-tld-1
drwxr-xr-x 2 root root    4096 Aug  8  2021 dts
-rw-r--r-- 1 root root 9649821 Sep 24  2021 initrd.img-5.13.8-mvebu-tld-1
-rw-r--r-- 1 root root 7785524 Aug  8  2021 linux-headers-5.13.8-mvebu-tld-1_1.0_armhf.deb
-rw-r--r-- 1 root root 4461631 Aug  7  2021 System.map-5.13.8-mvebu-tld-1
-rw------- 1 root root 5236162 Jan  3 17:32 uImage116
-rw------- 1 root root 5238426 Jan  3 17:40 uImage2350
-rw------- 1 root root 5236933 Jan  3 17:37 uImage816
-rw-r--r-- 1 root root 9649885 Sep 24  2021 uInitrd
-rwxr-xr-x 1 root root 5218232 Aug  7  2021 vmlinuz-5.13.8-mvebu-tld-1
-rwxr-xr-x 1 root root 5236098 Jan  3 13:45 zImage116.fdt
-rwxr-xr-x 1 root root 5238362 Jan  3 17:39 zImage2350.fdt
-rwxr-xr-x 1 root root 5218232 Aug  8  2021 zImage-5.13.8-mvebu-tld-1
-rwxr-xr-x 1 root root 5236869 Jan  3 17:36 zImage816.fdt
root@SYNOLOGYNAS:/volumeUSB1/usbshare/boot#
Quote
bodhi
If it looks ok I'm ready for the next magic step to bring the DS218j to live igain... :)
|
Re: Bricked Synology DS218j January 03, 2023 02:56PM |
Admin Registered: 13 years ago Posts: 18,543 |
- Copy the kernel files uImage116 and uInitrd to tftp root.
- Insert the USB rootfs to the box USB port next to the Ethernet port (probably does not matter which one, but in case only one USB port works, try this first).
- Power up, interrupt serial console at countdown.
- Get the listing of current envs. It will be needed later.
- Boot with tftp
Please post the entire serial console log (from u-boot banner until the last line on your terminal).
-bodhi
===========================
Forum Wiki
bodhi's corner (buy bodhi a beer)
- Insert the USB rootfs to the box USB port next to the Ethernet port (probably does not matter which one, but in case only one USB port works, try this first).
- Power up, interrupt serial console at countdown.
- Get the listing of current envs. It will be needed later.
printenv
- Boot with tftp
setenv fdt_skip_update yes
setenv bootargs "console=ttyS0,115200 root=LABEL=rootfs rootdelay=10 earlyprintk=serial"
tftpboot 0x800000 uImage116
tftpboot 0x2100000 uInitrd
bootm 0x800000 0x2100000
Please post the entire serial console log (from u-boot banner until the last line on your terminal).
-bodhi
===========================
Forum Wiki
bodhi's corner (buy bodhi a beer)
|
Re: Bricked Synology DS218j January 03, 2023 04:05PM |
Registered: 1 year ago Posts: 24 |
Quote
bodhi
Please post the entire serial console log (from u-boot banner until the last line on your terminal).
Here is my console log. For some reason I can't interrupt at the count down but due to the CRC error it stops anyway just after.
|
Re: Bricked Synology DS218j January 03, 2023 04:24PM |
Admin Registered: 13 years ago Posts: 18,543 |
elexidor,
> Here is my console log. For some reason I can't
> interrupt at the count down but due to the CRC
> error it stops anyway just after.
Congrats for a good progress! Looks like a lot are working so we know it is close.
SPI flash,
RTC
USB
SATA
Does this box have 2 SATA slots or 1 SATA slot?
Ethernet
Looks like the error is occuring at Ethernet bring up. It is expected that the ethernet PHY are likely different between these boxes.
===========
Try 2 more tests using other uImage's:
2nd test
3rd test
-bodhi
===========================
Forum Wiki
bodhi's corner (buy bodhi a beer)
Edited 1 time(s). Last edit at 01/03/2023 04:34PM by bodhi.
> Here is my console log. For some reason I can't
> interrupt at the count down but due to the CRC
> error it stops anyway just after.
Congrats for a good progress! Looks like a lot are working so we know it is close.
SPI flash,
[    3.203342][    T1] spi-nor spi0.0: mx25l6405d (8192 Kbytes)
[    3.209084][    T1] 6 fixed-partitions partitions found on MTD device spi0.0
RTC
[    3.361467][    T1] armada38x-rtc f10a3800.rtc: registered as rtc0
[    3.367783][    T1] armada38x-rtc f10a3800.rtc: setting system clock to 2023-01-03T21:58:25 UTC (1672783105)
USB
[    4.709932][ T1244] usb-storage 3-1:1.0: USB Mass Storage device detected
[    4.717082][ T1244] scsi host2: usb-storage 3-1:1.0
[    5.782380][ T1504] scsi 2:0:0:0: Direct-Access     Generic  Flash Disk       8.07 PQ: 0 ANSI: 4
[    5.792564][   T23] sd 2:0:0:0: [sda] 30310400 512-byte logical blocks: (15.5 GB/14.5 GiB)
SATA
[   10.082011][  T543] scsi 0:0:0:0: Direct-Access     ATA      ST1000DM010-2DM1 CC46 PQ: 0 ANSI: 5
[   10.091573][ T1504] sd 0:0:0:0: [sdb] 1953525168 512-byte logical blocks: (1.00 TB/932 GiB)
Does this box have 2 SATA slots or 1 SATA slot?
Ethernet
Looks like the error is occuring at Ethernet bring up. It is expected that the ethernet PHY are likely different between these boxes.
===========
Try 2 more tests using other uImage's:
2nd test
setenv fdt_skip_update yes
setenv bootargs "console=ttyS0,115200 root=LABEL=rootfs rootdelay=10 earlyprintk=serial"
tftpboot 0x800000 uImage816
tftpboot 0x2100000 uInitrd
bootm 0x800000 0x2100000
3rd test
setenv fdt_skip_update yes
setenv bootargs "console=ttyS0,115200 root=LABEL=rootfs rootdelay=10 earlyprintk=serial"
tftpboot 0x800000 uImage2350
tftpboot 0x2100000 uInitrd
bootm 0x800000 0x2100000
-bodhi
===========================
Forum Wiki
bodhi's corner (buy bodhi a beer)
Edited 1 time(s). Last edit at 01/03/2023 04:34PM by bodhi.
|
Re: Bricked Synology DS218j January 03, 2023 04:48PM |
Registered: 1 year ago Posts: 24 |
Great!
The box has two SATA but I'm not 100% sure about the status of the disks. Attached two new consol logs.
Its midnight local time here so I will take a break and continue next morning.
Thanks, so far. :)
The box has two SATA but I'm not 100% sure about the status of the disks. Attached two new consol logs.
Its midnight local time here so I will take a break and continue next morning.
Thanks, so far. :)
|
Re: Bricked Synology DS218j January 03, 2023 06:04PM |
Admin Registered: 13 years ago Posts: 18,543 |
I recall Martin has reported that the kernel 5.13.8-mvebu-tld-1 might be a bit flaky, especially testing different DTB from other boxes.
Either try a few boots like Martin did.
Or we can just use the latest kernel 6.0.7-mvebu-tld-1 zImage. Download this kernel tarball from the release thread:
Extract the kernel to a temporary folder
Use the zImage-6.0.7-mvebu-tld-1 file in this kernel to make 3 uImages like you did before.
(use whatever naming covention you'd like):
And then run test 1, 2, 3 like you did with these 3 new uImages.
-bodhi
===========================
Forum Wiki
bodhi's corner (buy bodhi a beer)
Edited 1 time(s). Last edit at 01/03/2023 06:27PM by bodhi.
Quote
https://forum.doozan.com/read.php?2,133377,133377#msg-133377
- the 5.13.8 kernel was not very stable, but just enough to get install the 6.0.7 kernel, which works very well. Took a few reboots. So if you see problems like a kernel dump about cpu stalls, just try again.
Either try a few boots like Martin did.
Or we can just use the latest kernel 6.0.7-mvebu-tld-1 zImage. Download this kernel tarball from the release thread:
Quote
https://forum.doozan.com/read.php?2,32146
Updated 09 Nov 2022:
Kernel 6.0.7-mvebu-tld-1 package has been uploaded.
New/Updated in this release:
- General kernel upgrade.
Latest Linux kernel 6.x general release information can be found at:
LinuxChanges log
Download at Dropbox
linux-6.0.7-mvebu-tld-1-bodhi.tar.bz2
md5:
bfb1d7cf103f501b991e21b9886db4f6
sha256:
dcf50e17352f7d84ab606abdef374ec0d3db1c39b242c6ae7924b7283edc3ead
Extract the kernel to a temporary folder
mkdir -p /volumeUSB1/boot/linux-6.0.7
cd /volumeUSB1/boot/linux-6.0.7
tar xjf linux-6.0.7-mvebu-tld-1-bodhi.tar.bz2
Use the zImage-6.0.7-mvebu-tld-1 file in this kernel to make 3 uImages like you did before.
(use whatever naming covention you'd like):
uImage116-k6
uImage2350-k6
uImage816-k6
And then run test 1, 2, 3 like you did with these 3 new uImages.
-bodhi
===========================
Forum Wiki
bodhi's corner (buy bodhi a beer)
Edited 1 time(s). Last edit at 01/03/2023 06:27PM by bodhi.
|
Re: Bricked Synology DS218j January 04, 2023 02:42AM |
Registered: 1 year ago Posts: 24 |
bodhi Wrote:
-------------------------------------------------------
>
> Either try a few boots like Martin did.
>
> Or we can just use the latest kernel
> 6.0.7-mvebu-tld-1 zImage. Download this kernel
> tarball from the release thread:
Ok, I've tried repeated boots but it just gets "stall on CPU".
I'll test Kernel 6.0.7 when I get back from a holiday trip on Saturday.
To be continued...
|
Re: Bricked Synology DS218j January 09, 2023 09:15AM |
Registered: 1 year ago Posts: 24 |
Hi again!
I have now tried to build three new versions based on zImage-6.0.7-mvebu-tld-1.
Unfortunately I did not succeed to boot with any of them. I get stack exceptions after a while during boot and the 816-version did not worked at all (I may have done something wrong when build?)
It is really pity because I dont think there are any hardware faults and it boots ok according to my first post with this sequence:
Can it be related to the version of the uInitrd in some way?
I have now tried to build three new versions based on zImage-6.0.7-mvebu-tld-1.
Unfortunately I did not succeed to boot with any of them. I get stack exceptions after a while during boot and the 816-version did not worked at all (I may have done something wrong when build?)
It is really pity because I dont think there are any hardware faults and it boots ok according to my first post with this sequence:
tftpboot 0xd00000 zImage
tftpboot 0x800000 rd.bin
tftpboot 0x1000000 dtbdump_3.dtb
bootm 0xd00000 0x800000 0x01000000
Can it be related to the version of the uInitrd in some way?
|
Re: Bricked Synology DS218j January 09, 2023 03:36PM |
Admin Registered: 13 years ago Posts: 18,543 |
elexidor,
This uimage2350_k607 was created incorrectly. It is showing the RS816 being used in the log synology_ds218j_boot_uimage2350_k607.txt
=======================
Here is another set of 3 tests (replace uImage with each flavor).
See how far you get with just uImage. We don't really need Initrd to run the kernel at this point.
-bodhi
===========================
Forum Wiki
bodhi's corner (buy bodhi a beer)
This uimage2350_k607 was created incorrectly. It is showing the RS816 being used in the log synology_ds218j_boot_uimage2350_k607.txt
=======================
Here is another set of 3 tests (replace uImage with each flavor).
setenv fdt_skip_update yes
setenv bootargs "console=ttyS0,115200 root=/dev/sda1 rootdelay=10 earlyprintk=serial"
tftpboot 0x800000 uImage
bootm 0x800000
See how far you get with just uImage. We don't really need Initrd to run the kernel at this point.
-bodhi
===========================
Forum Wiki
bodhi's corner (buy bodhi a beer)
|
Re: Bricked Synology DS218j January 09, 2023 04:55PM |
Registered: 1 year ago Posts: 24 |
bodhi Wrote:
-------------------------------------------------------
> elexidor,
>
> This uimage2350_k607 was created incorrectly. It
> is showing the RS816 being used in the log
> synology_ds218j_boot_uimage2350_k607.txt
>
> =======================
>
> Here is another set of 3 tests (replace uImage
> with each flavor).
>
>
> See how far you get with just uImage. We don't
> really need Initrd to run the kernel at this
> point.
Ok, thank you.
I will rebuild uimage816_k607 and uimage2350_k607 tomorrow and test again.
Just did two quick tests before bed. First one uImage116 (based on 5.13.8). The second uImage116-k607 (based on 6.0.7). Noone boots but I attach logs.
-------------------------------------------------------
> elexidor,
>
> This uimage2350_k607 was created incorrectly. It
> is showing the RS816 being used in the log
> synology_ds218j_boot_uimage2350_k607.txt
>
> =======================
>
> Here is another set of 3 tests (replace uImage
> with each flavor).
>
>
> setenv fdt_skip_update yes
> setenv bootargs "console=ttyS0,115200
> root=/dev/sda1 rootdelay=10 earlyprintk=serial"
> tftpboot 0x800000 uImage
> bootm 0x800000
>
>
> See how far you get with just uImage. We don't
> really need Initrd to run the kernel at this
> point.
Ok, thank you.
I will rebuild uimage816_k607 and uimage2350_k607 tomorrow and test again.
Just did two quick tests before bed. First one uImage116 (based on 5.13.8). The second uImage116-k607 (based on 6.0.7). Noone boots but I attach logs.
|
Re: Bricked Synology DS218j January 09, 2023 05:40PM |
Admin Registered: 13 years ago Posts: 18,543 |
This test is better:
synology_ds218j_boot_uimage116_k607_only.txt
But it seems you did not have the USB rootfs attached to the port. Also if you could, remove the HDD from the slot.
Reason: the USB rootfs is going to be /dev/sda1 if it is the only storage drive attached. The HDD is always assigned first, so if there is HDD in slot it will take /dev/sda1. And then the USB will be /dev/sdb1.
-bodhi
===========================
Forum Wiki
bodhi's corner (buy bodhi a beer)
synology_ds218j_boot_uimage116_k607_only.txt
But it seems you did not have the USB rootfs attached to the port. Also if you could, remove the HDD from the slot.
Reason: the USB rootfs is going to be /dev/sda1 if it is the only storage drive attached. The HDD is always assigned first, so if there is HDD in slot it will take /dev/sda1. And then the USB will be /dev/sdb1.
setenv fdt_skip_update yes
setenv bootargs "console=ttyS0,115200 root=/dev/sda1 rootdelay=10 earlyprintk=serial"
tftpboot 0x800000 uImage
bootm 0x800000
-bodhi
===========================
Forum Wiki
bodhi's corner (buy bodhi a beer)
|
Re: Bricked Synology DS218j January 09, 2023 10:31PM |
Admin Registered: 13 years ago Posts: 18,543 |
Now I've checked the main release thread and realized that this has been worked on. salahuddin used the the RS816 DTB.
https://forum.doozan.com/read.php?2,76314,122749#msg-122749
Must be my memory is no longer it used to be after the pandemic :))
Please use the RS816 DTB for testing.
-bodhi
===========================
Forum Wiki
bodhi's corner (buy bodhi a beer)
Quote
- Thanks salahuddin for bring up the Synology DS218j.
https://forum.doozan.com/read.php?2,76314,122749#msg-122749
Must be my memory is no longer it used to be after the pandemic :))
Please use the RS816 DTB for testing.
-bodhi
===========================
Forum Wiki
bodhi's corner (buy bodhi a beer)
|
Re: Bricked Synology DS218j January 10, 2023 06:16AM |
Registered: 1 year ago Posts: 24 |
bodhi Wrote:
-------------------------------------------------------
> This test is better:
>
> synology_ds218j_boot_uimage116_k607_only.txt
>
> But it seems you did not have the USB rootfs
> attached to the port. Also if you could, remove
> the HDD from the slot.
>
> Reason: the USB rootfs is going to be /dev/sda1 if
> it is the only storage drive attached. The HDD is
> always assigned first, so if there is HDD in slot
> it will take /dev/sda1. And then the USB will be
> /dev/sdb1.
>
Oh crap! I forgot to insert the USB stick. Sorry.
I have done some repetitive tests with RS816 without disks. Both built with 5.13.8 and with 6.0.7. It looks better now but sometimes I get crashes. When the boot runs as longest it stops at the last line in attached log file.
I'm thinking if I should try with a new formatted drive in one SATA slot or if it is better to try something else to complete the boot process?
|
Re: Bricked Synology DS218j January 10, 2023 04:40PM |
Admin Registered: 13 years ago Posts: 18,543 |
Here is what salahuddin did to boot this box with RS816 DTB.
You are still trying to boot with tftp and USB rootfs, so the envs should be
And please redo the rootfs using Debian-5.2.9-mvebu-tld-1-rootfs-bodhi.tar.bz2 in the release thread.
Make sure you follow the instruction verbatim. Being root user (not sudo), create a single partition, format it using Ext3 (not Ext4) file system, and label it as rootfs.
On this rootfs, create uImage with armada-385-synology-rs816.dtb. And then copy uImage and uInitrd to tftproot.
-bodhi
===========================
Forum Wiki
bodhi's corner (buy bodhi a beer)
Edited 1 time(s). Last edit at 01/10/2023 11:38PM by bodhi.
Quote
setenv load_image_addr 0x02000000
setenv load_initrd_addr 0x3000000
setenv load_image 'echo loading uImage from raw HDD ...; scsi device 0; scsi read $load_image_addr 0x5000 0x2F00'
setenv load_initrd 'echo loading uInitrd from raw HDD ...; scsi device 0; scsi read $load_initrd_addr 0xA000 0xAF00'
setenv set_bootargs 'setenv bootargs "console=ttyS0,115200 root=LABEL=rootfs rootdelay=10 $mtdparts earlyprintk=serial"'
setenv bootcmd_exec 'echo Booting Debian ...; run set_bootargs; setenv fdt_skip_update yes; setenv initrd_high 0xffffffff; run load_image; run load_initrd; bootm $load_image_addr $load_initrd_addr'
setenv bootcmd 'scsi init; run bootcmd_exec; echo Booting Stock OS ...; run bootspi'
You are still trying to boot with tftp and USB rootfs, so the envs should be
setenv load_image_addr 0x02000000
setenv load_initrd_addr 0x3000000
setenv fdt_skip_update yes
setenv initrd_high 0xffffffff
setenv bootargs "console=ttyS0,115200 root=LABEL=rootfs rootdelay=10 $mtdparts earlyprintk=serial"
tftpboot $load_image_addr uImage
tftpboot $load_initrd_addr uInitrd
bootm  $load_image_addr $load_initrd_addr
And please redo the rootfs using Debian-5.2.9-mvebu-tld-1-rootfs-bodhi.tar.bz2 in the release thread.
Quote
Updated 10 Sep 2019:
Rootfs Debian-5.2.9-mvebu-tld-1-rootfs-bodhi.tar.bz2 has been uploaded.
Basic Debian buster armhf rootfs for most MVEBU Armada NAS:
- tarball size: 258M
- install size: 680M
- The init system used in this rootfs is sysvinit . To boot with systemd, see note 2 below.
- Installed packages: openssh-server, nano, avahi, libnss-mdns, ntp, busybox-syslogd (log to RAM), htop, isc-dhcp-client, locales, dialog, bzip2, nfs-kernel-server, nfs-common, iperf, ethtool, sysvinit-core, sysvinit, and sysvinit-utils, mtd-utils, u-boot-tools, rsync, pmount, i2c-tools, qemu-arm-static (x86 version).
- see LED controls in /etc/rc.local, and /etc/init.d/halt
- see some useful aliases in /root/.profile
- root password: root
Download at Dropbox:
Debian-5.2.9-mvebu-tld-1-rootfs-bodhi.tar.bz2
md5:
ffa864878dd797241c0bea05d563239a
sha256:
15d111a119aa1b1909b33178056c5d11d310a16f84d66f741f4dfd7c7e5d1b59
Make sure you follow the instruction verbatim. Being root user (not sudo), create a single partition, format it using Ext3 (not Ext4) file system, and label it as rootfs.
On this rootfs, create uImage with armada-385-synology-rs816.dtb. And then copy uImage and uInitrd to tftproot.
-bodhi
===========================
Forum Wiki
bodhi's corner (buy bodhi a beer)
Edited 1 time(s). Last edit at 01/10/2023 11:38PM by bodhi.
|
Re: Bricked Synology DS218j January 11, 2023 04:56AM |
Registered: 1 year ago Posts: 24 |
Thank you bodhi!
I have a feeling we're getting closer with 5.2.9 :)
I created a new USB stick with Debian-5.2.9-mvebu-tld-1-rootfs-bodhi.tar.bz2 and think I did all the steps correctly.
Unfortunately, when I used those envars I got the same CRC error as from the beginning:
However, If I use the following envars mentioned erlier in this thread a lot of things happening. It checks the root file system and comes to 92.7% according to the attached file. At the end a maintenance shell is started and I can explore the USB-stick:
It feels like a progress but have no clue how to go further. :))
Edited 1 time(s). Last edit at 01/11/2023 04:59AM by elexidor.
I have a feeling we're getting closer with 5.2.9 :)
I created a new USB stick with Debian-5.2.9-mvebu-tld-1-rootfs-bodhi.tar.bz2 and think I did all the steps correctly.
Quote
You are still trying to boot with tftp and USB rootfs, so the envs should be
setenv load_image_addr 0x02000000
setenv load_initrd_addr 0x3000000
setenv fdt_skip_update yes
setenv initrd_high 0xffffffff
setenv bootargs "console=ttyS0,115200 root=LABEL=rootfs rootdelay=10 $mtdparts earlyprintk=serial"
tftpboot $load_image_addr uImage
tftpboot $load_initrd_addr uInitrd
bootm  $load_image_addr $load_initrd_addr
Unfortunately, when I used those envars I got the same CRC error as from the beginning:
Marvell>> setenv load_image_addr 0x02000000
setenv load_image_addr 0x02000000
Marvell>> setenv load_initrd_addr 0x3000000
setenv load_initrd_addr 0x3000000
Marvell>> setenv fdt_skip_update yes
setenv fdt_skip_update yes
Marvell>> setenv initrd_high 0xffffffff
setenv initrd_high 0xffffffff
Marvell>> setenv bootargs "console=ttyS0,115200 root=LABEL=rootfs rootdelay=10 $mtdparts earlyprintk=serial"
setenv bootargs "console=ttyS0,115200 root=LABEL=rootfs rootdelay=10 $mtdparts earlyprintk=serial"
Marvell>> tftpboot $load_image_addr uImage
tftpboot $load_image_addr uImage
Using egiga0 device
TFTP from server 192.168.1.137; our IP address is 192.168.1.102
Filename 'uImage'.
Load address: 0x2000000
Loading: #################################################################
	 #################################################################
	 #################################################################
	 #################################################################
	 #################################################################
	 #####################
	 727.5 KiB/s
done
Bytes transferred = 5076212 (4d74f4 hex)
Marvell>> tftpboot $load_initrd_addr uInitrd
tftpboot $load_initrd_addr uInitrd
Using egiga0 device
TFTP from server 192.168.1.137; our IP address is 192.168.1.102
Filename 'uInitrd'.
Load address: 0x3000000
Loading: #################################################################
	 #################################################################
	 #################################################################
	 #################################################################
	 #################################################################
	 #################################################################
	 #################################################################
	 #################################################################
	 #################################################################
	 ##############################################################
	 781.3 KiB/s
done
Bytes transferred = 9488618 (90c8ea hex)
Marvell>> bootm  $load_image_addr $load_initrd_addr
bootm  $load_image_addr $load_initrd_addr
## Booting kernel from Legacy Image at 02000000 ...
   Image Name:   Linux-5.2.9-mvebu-tld-1
   Created:      2023-01-11   8:05:54 UTC
   Image Type:   ARM Linux Kernel Image (uncompressed)
   Data Size:    5076148 Bytes = 4.8 MiB
   Load Address: 00008000
   Entry Point:  00008000
   Verifying Checksum ... OK
## Loading init Ramdisk from Legacy Image at 03000000 ...
   Image Name:   initramfs-5.2.9-mvebu-tld-1
   Created:      2019-08-26  11:03:27 UTC
   Image Type:   ARM Linux RAMDisk Image (gzip compressed)
   Data Size:    9488554 Bytes = 9 MiB
   Load Address: 00000000
   Entry Point:  00000000
   Verifying Checksum ... Bad Data CRC
Ramdisk image is corrupt or invalid
Marvell>>
However, If I use the following envars mentioned erlier in this thread a lot of things happening. It checks the root file system and comes to 92.7% according to the attached file. At the end a maintenance shell is started and I can explore the USB-stick:
setenv fdt_skip_update yes
setenv bootargs "console=ttyS0,115200 root=LABEL=rootfs rootdelay=10 earlyprintk=serial"
tftpboot 0x800000 uImage
tftpboot 0x2100000 uInitrd
bootm 0x800000 0x2100000
root@debian:/# ls -l
ls -l
total 263916
drwxrwxrwx  3 root root       4096 Jan 10 23:43 @eaDir
drwxrwxrwt  2 root root       4096 Jan 10 23:42 @tmp
-rwxrwxrwx  1 1026 users 269907402 Jan 10 23:33 Debian-5.2.9-mvebu-tld-1-rootfs-bodhi.tar.bz2
drwxr-xr-x  2 root root       4096 Aug 26  2019 bin
drwxr-xr-x  3 root root       4096 Jan 11 00:05 boot
drwxr-xr-x 13 root root      13240 Jan 11 01:53 dev
drwxr-xr-x 70 root root       4096 Sep  5  2019 etc
drwxr-xr-x  2 root root       4096 Sep 11  2016 home
drwxr-xr-x 13 root root       4096 Aug 26  2019 lib
drwx------  2 root root       4096 Jan  9  2017 lost+found
drwxr-xr-x  2 root root       4096 Jan 20  2017 media
drwxr-xr-x  2 root root       4096 Jan  2  2017 mnt
drwxr-xr-x  2 root root       4096 Jan  2  2017 opt
dr-xr-xr-x 80 root root          0 Dec 31  1969 proc
drwx------  5 root root       4096 Sep  9  2019 root
drwxr-xr-x  6 root root        200 Jan 11 01:53 run
drwxr-xr-x  2 root root       4096 Aug 26  2019 sbin
drwxr-xr-x  2 root root       4096 Jan  2  2017 srv
dr-xr-xr-x 12 root root          0 Jan 11 01:53 sys
drwxrwxrwt  2 root root       4096 Sep  5  2019 tmp
-rw-------  1 root root          0 Jan 11 00:05 uImage
drwxr-xr-x 10 root root       4096 Jan  2  2017 usr
drwxr-xr-x 11 root root       4096 Jan  2  2017 var
root@debian:/# cd boot
cd boot
root@debian:/boot# ls -l
ls -l
total 56220
-rw------- 1 root root 3266081 Aug 19  2019 System.map-5.2.9-mvebu-tld-1
-rw-r--r-- 1 root root  183639 Aug 19  2019 config-5.2.9-mvebu-tld-1
drwxr-xr-x 2 root root    4096 Aug 19  2019 dts
-rw-r--r-- 1 root root 9488554 Aug 26  2019 initrd.img-5.2.9-mvebu-tld-1
-rw-r--r-- 1 root root 9676808 Aug 19  2019 linux-headers-5.2.9-mvebu-tld-1_1.0_armhf.deb
-rw------- 1 root root 5076212 Jan 11 00:05 uImage
-rw-r--r-- 1 root root 9488618 Aug 26  2019 uInitrd
-rw------- 1 root root 5057632 Aug 19  2019 vmlinuz-5.2.9-mvebu-tld-1
-rwxr-xr-x 1 root root 5057632 Aug 19  2019 zImage
-rwxr-xr-x 1 root root 5057632 Aug 19  2019 zImage-5.2.9-mvebu-tld-1
-rwxr-xr-x 1 root root 5076148 Jan 10 23:57 zImage.fdt
root@debian:/boot#
It feels like a progress but have no clue how to go further. :))
Edited 1 time(s). Last edit at 01/11/2023 04:59AM by elexidor.
|
Re: Bricked Synology DS218j January 11, 2023 08:26AM |
Registered: 1 year ago Posts: 24 |
In this thread salahuddin66 seemed to have exactly the same problem with CRC error in initrdramfs:
https://forum.doozan.com/read.php?2,76314,122829#msg-122829
He mentioned that the root cause was the address range:
https://forum.doozan.com/read.php?2,76314,122869#msg-122869
I have a strong feeling thats the same on my box. Hm.
The positive side is I'm learning some more Linux stuff... :))
Edited 1 time(s). Last edit at 01/11/2023 08:44AM by elexidor.
|
Re: Bricked Synology DS218j January 11, 2023 03:52PM |
Admin Registered: 13 years ago Posts: 18,543 |
elexidor,
> I have a feeling we're getting closer with 5.2.9
> :)
Yes!
> However, If I use the following envars mentioned
> erlier in this thread a lot of things happening.
> It checks the root file system and comes to 92.7%
> according to the attached file. At the end a
> maintenance shell is started and I can explore the
> USB-stick:
What do you mean by a maintenance shell? What we call a "maintenance shell" is when it stopped booting at initrd. because of some error. When you see the prompt "debian:" then it was done booting. It seems that was the case here. And you are golden :)
If that is the case then check the IP address
You should post the entire serial console log. So I can take a look to see if there is any thing abnormal.
-bodhi
===========================
Forum Wiki
bodhi's corner (buy bodhi a beer)
> I have a feeling we're getting closer with 5.2.9
> :)
Yes!
> However, If I use the following envars mentioned
> erlier in this thread a lot of things happening.
> It checks the root file system and comes to 92.7%
> according to the attached file. At the end a
> maintenance shell is started and I can explore the
> USB-stick:
What do you mean by a maintenance shell? What we call a "maintenance shell" is when it stopped booting at initrd. because of some error. When you see the prompt "debian:" then it was done booting. It seems that was the case here. And you are golden :)
If that is the case then check the IP address
ifconfig -aAnd then open another terminal and try SSH in. The same credential is root/root.
ssh root@<the DS218j IP address>
You should post the entire serial console log. So I can take a look to see if there is any thing abnormal.
-bodhi
===========================
Forum Wiki
bodhi's corner (buy bodhi a beer)
|
Re: Bricked Synology DS218j January 11, 2023 04:09PM |
Registered: 1 year ago Posts: 24 |
bodhi Wrote:
-------------------------------------------------------
> What do you mean by a maintenance shell?
> What we call a "maintenance shell" is when it
> stopped booting at initrd. because of some error.
> When you see the prompt "debian:" then it was done
> booting. It seems that was the case here. And you
> are golden :)
>
That was the last printout in the attached file synology_ds218j_boot_5_2_9_maintenance.txt I posted erlier today.
|
Re: Bricked Synology DS218j January 11, 2023 04:41PM |
Registered: 1 year ago Posts: 24 |
I did a new try with the same envars and this time the file system check procedure completed and an automatic restart was performed. After that the CRC error was back. Attached log file:
synology_ds218j_boot_5_2_9_filesys_check_compl.txt
Then I did the same again, and this time the boot was ... completed (!) Attached log file:
synology_ds218j_boot_5_2_9_boot_complete.txt
and I can SSH in from my PC:
Wohoo!
But if I run "reboot" from terminal it stops with the CRC error again. :(
Edited 1 time(s). Last edit at 01/11/2023 04:56PM by elexidor.
synology_ds218j_boot_5_2_9_filesys_check_compl.txt
Then I did the same again, and this time the boot was ... completed (!) Attached log file:
synology_ds218j_boot_5_2_9_boot_complete.txt
and I can SSH in from my PC:
Debian GNU/Linux comes with ABSOLUTELY NO WARRANTY, to the extent
permitted by applicable law.
Last login: Wed Jan 11 14:28:07 2023
debian
192.168.1.138
Synology RS816
Linux version 5.2.9-mvebu-tld-1 (root@tldDebianVM) (gcc version 7.4.0 (Ubuntu/Linaro 7.4.0-1ubuntu1~18.04.1)) #1 SMP PREEMPT Mon Aug 19 12:47:39 PDT 2019
Debian 10.0
Wed Jan 11 14:29:31 PST 2023 up 2 minutes
root@debian:~#
Wohoo!
But if I run "reboot" from terminal it stops with the CRC error again. :(
Edited 1 time(s). Last edit at 01/11/2023 04:56PM by elexidor.
|
Re: Bricked Synology DS218j January 11, 2023 05:10PM |
Admin Registered: 13 years ago Posts: 18,543 |
I see.
Everything was looking really good until the rootfs mounting. The rootfs was created incorrectly. I mentioned this above
When you run a Ubuntu VM or similar, you need to use command line to create the partition and format it with Ext3 file system. Your rootfs must have been formatted using GUI? the default for those dialogs is Ext4. An Ext4 file system created like that cannot be used for rootfs. There is an option that basically forces the Ext4 file system to be "finalized" immediately and you must use command line to do that. So that's why I chose Ext3 in the instruction to make it simple.
So forgive me if you already know how to do these steps below!
Open a terminal on Ubuntu and become root
- Use fdisk command to wipe the USB drive and create a new partition. Where x is the drive letter assign to this USB drive when you insert it (run dmesg | tail to see this). If it is mounted automatically, you have to manually unmount it first. And be careful here and make sure it is the USB drive, because you're going to wipe it as root user.
- Use mkfs.ext3 command to format it and label the partition as rootfs at the same time. Where x is the drive letter and partition number 1.
- Follow the instruction in the rootfs release and untar the tarball.
- And then make uImage using the RS816 DTB.
-bodhi
===========================
Forum Wiki
bodhi's corner (buy bodhi a beer)
Edited 1 time(s). Last edit at 01/11/2023 08:18PM by bodhi.
Everything was looking really good until the rootfs mounting. The rootfs was created incorrectly. I mentioned this above
Quote
Make sure you follow the instruction verbatim. Being root user (not sudo), create a single partition, format it using Ext3 (not Ext4) file system, and label it as rootfs.
When you run a Ubuntu VM or similar, you need to use command line to create the partition and format it with Ext3 file system. Your rootfs must have been formatted using GUI? the default for those dialogs is Ext4. An Ext4 file system created like that cannot be used for rootfs. There is an option that basically forces the Ext4 file system to be "finalized" immediately and you must use command line to do that. So that's why I chose Ext3 in the instruction to make it simple.
So forgive me if you already know how to do these steps below!
Open a terminal on Ubuntu and become root
su -
whoami
- Use fdisk command to wipe the USB drive and create a new partition. Where x is the drive letter assign to this USB drive when you insert it (run dmesg | tail to see this). If it is mounted automatically, you have to manually unmount it first. And be careful here and make sure it is the USB drive, because you're going to wipe it as root user.
fdisk /dev/sdx
- Use mkfs.ext3 command to format it and label the partition as rootfs at the same time. Where x is the drive letter and partition number 1.
mkfs.ext3 -L rootfs /dev/sdx1
- Follow the instruction in the rootfs release and untar the tarball.
- And then make uImage using the RS816 DTB.
-bodhi
===========================
Forum Wiki
bodhi's corner (buy bodhi a beer)
Edited 1 time(s). Last edit at 01/11/2023 08:18PM by bodhi.
|
Re: Bricked Synology DS218j January 11, 2023 05:12PM |
Admin Registered: 13 years ago Posts: 18,543 |
I was reponding to previous post wiht the log synology_ds218j_boot_5_2_9_maintenance.txt.
-bodhi
===========================
Forum Wiki
bodhi's corner (buy bodhi a beer)
-bodhi
===========================
Forum Wiki
bodhi's corner (buy bodhi a beer)
